
Are you looking to hatch your leopard gecko eggs? What makes an ideal incubator? Curious about how to ensure a successful hatch?
Proper incubation plays a crucial role in the hatching process. Get it right, and you’ll welcome healthy, vibrant hatchlings. Mess it up, and you risk losing the entire clutch. Learn how to set up the ultimate gecko habitat.
Leopard Gecko Reproduction
Leopard geckos lay eggs after mating, usually in pairs. The female can store sperm for several months, allowing her to lay multiple clutches from a single mating session. She’ll lay her eggs in a moist, hidden spot, often burying them for extra safety.
Temperature plays a significant role in what sex the hatchlings will be. Warmer temps produce males, while cooler ones usually result in females. It’s not just about hatching the eggs; it’s also about planning your gecko family.
An excellent nesting environment is critical. The female needs a safe, moist area to lay her eggs. The eggs might not develop properly without the right conditions, or the female might not lay them. Provide a nesting box filled with moist substrate, like peat moss or vermiculite.
Materials Needed
Before you jump into the incubation process, gather all the essential materials.
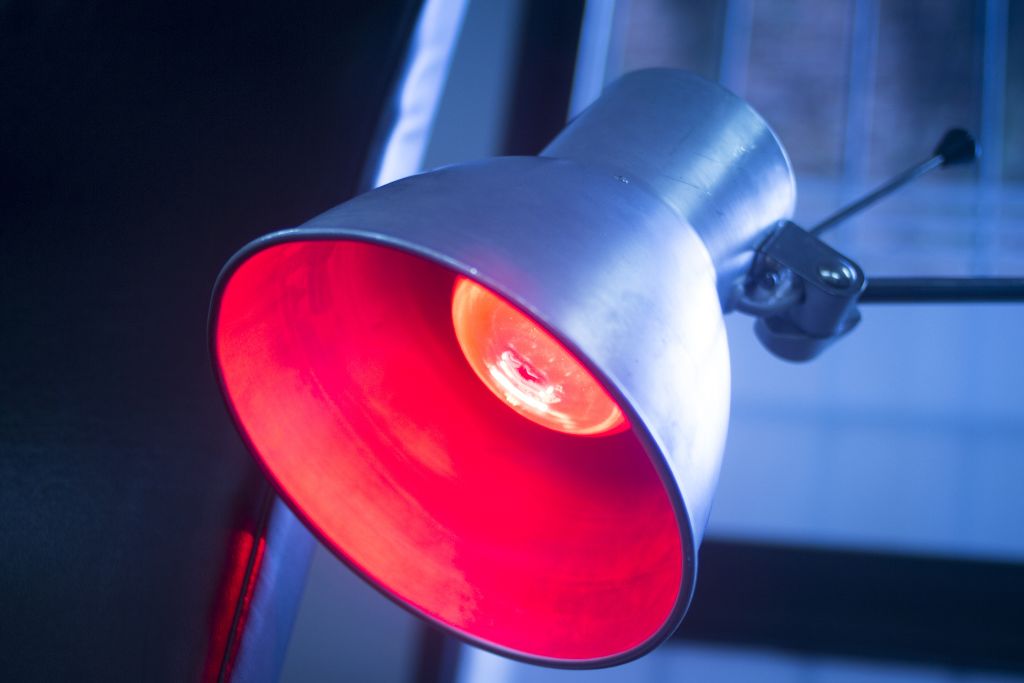
- Incubator: An incubator is the heart of the operation. Choose one that allows you to control both temperature and humidity. Stability is vital, so invest in a reliable model.
- Substrate: You’ll need a substrate, like vermiculite or perlite, to hold the eggs. It should be moist but not wet, creating the ideal environment for egg development.
- Containers: Get small, sealable containers to hold the substrate and eggs. Ensure they have small air holes for ventilation but not so large that they let out too much moisture.
- Hygrometer: A hygrometer measures humidity. You’ll need one to ensure the incubator’s environment stays moist enough for the eggs.
- Thermometer: Temperature control is crucial. A reliable thermometer will help you monitor and adjust the heat inside the incubator.
- Water: Distilled water is best for moistening the substrate. Tap water can contain chemicals that might harm the eggs.
- Additional Supplies: Other items like a spray bottle for misting and a soft brush for handling eggs can also be helpful. These aren’t strictly necessary but can make the process easier and more precise.
Step-by-Step Guide on How to Incubate Leopard Gecko Eggs
Ready to start incubating your leopard gecko eggs? We’ve got you covered, from preparing the eggs to monitoring their progress.
Preparing the Eggs
Collecting eggs from the nesting box is your first step. Gently lift them out using either your fingers or a soft brush. Ensure not to rotate the eggs – doing so can harm the developing embryo. To pick the best eggs for incubation, look for plump ones with a firm shell. Avoid eggs that appear shriveled or discolored.
Setting Up the Incubator
Before placing the eggs, let’s get that incubator ready. Here’s how:
- Fill Containers: Add moist vermiculite or perlite to your small, sealable containers.
- Position Hygrometer and Thermometer: Place these devices inside the incubator to monitor humidity and temperature.
- Set Temperature: For hatching males, set the incubator’s temperature to a range of 88-91°F (31-33°C). Females require a cooler setting, between 80-84°F (27-29°C).
Placing the Eggs
Now is the time to place the eggs in the incubator. Follow these steps:
- Position Eggs: Place the eggs gently on the substrate in your container.
- Space Them Out: Keep at least an inch between each egg to prevent crowding and potential damage during hatching.
Monitoring and Adjusting
Consistent monitoring of temperature and humidity is crucial. Any drastic changes can harm the eggs. Check the hygrometer and thermometer at least once a day. If you notice minor fluctuations, adjust the incubator settings slightly.
If humidity drops, lightly sprinkle the substrate with distilled water. Be vigilant for mold or bad smells – these are red flags that demand quick action.
Duration of Incubation
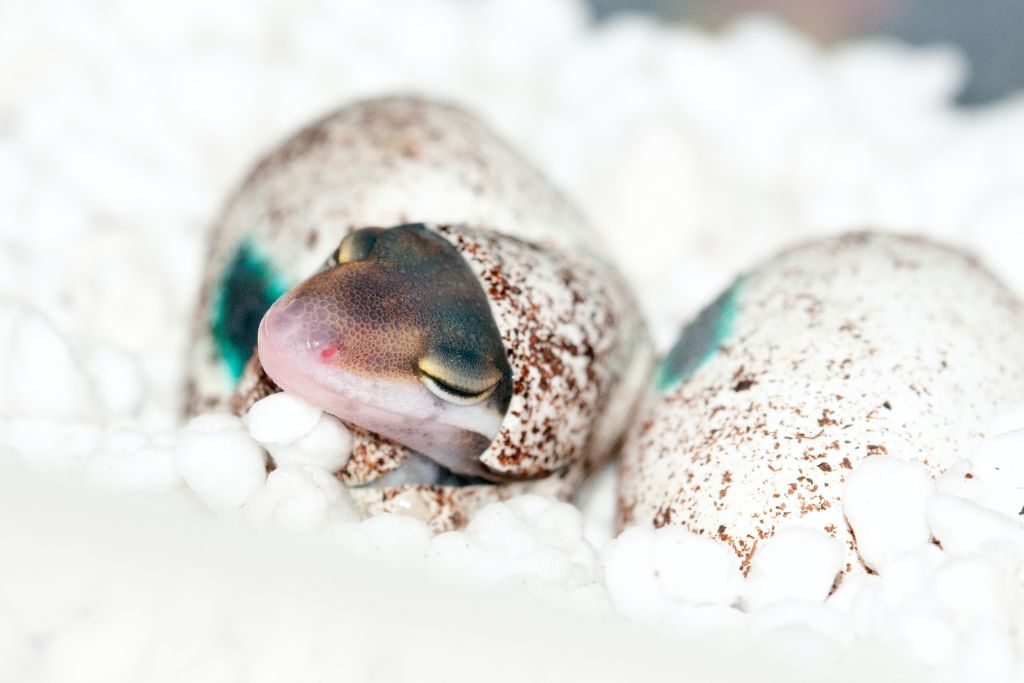
Leopard gecko eggs usually take 35 to 89 days to hatch, depending on the incubation temperature. As the big day approaches, you’ll notice signs of imminent hatching. The eggs may start to dimple slightly, and you could even see a small tear or “pip” in the shell where the baby gecko starts to break out.
Commercial Incubator Options
Considering a commercial incubator? Different types are available, each with unique advantages and drawbacks.
Styrofoam Incubators
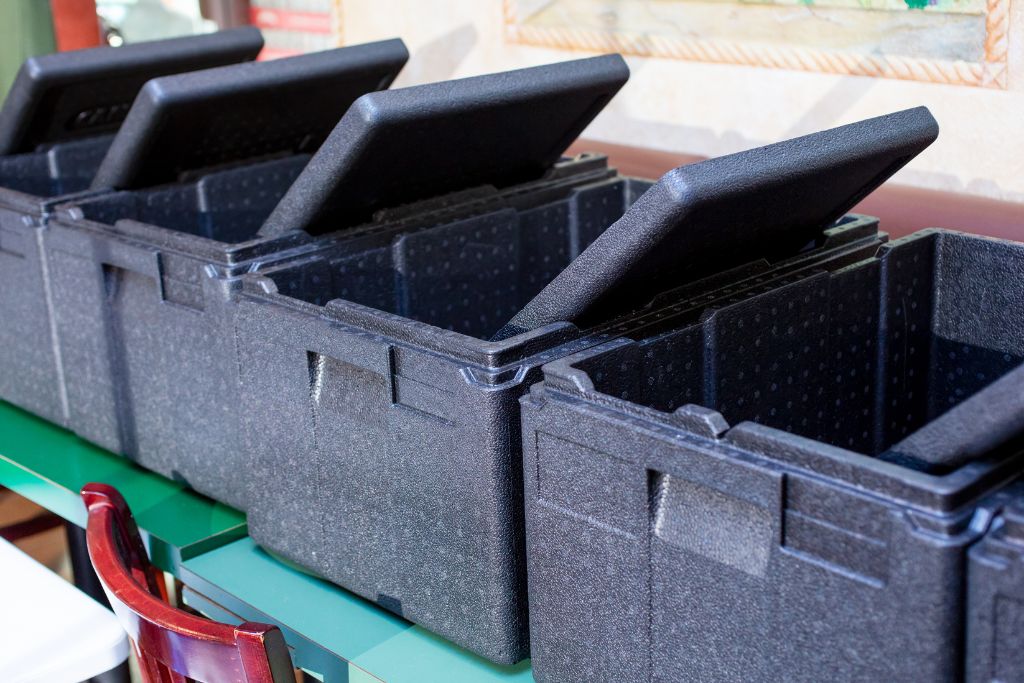
When it comes to affordability, Styrofoam incubators take the cake. They’re also lightweight and easy to find in stores or online. However, they come with a downside – the temperature control isn’t as precise as in other types. Durability can also be an issue, as they’re not built to last as long as other options.
Digital Incubators
Digital incubators excel in providing precise control over temperature and humidity. Built-in hygrometers and thermometers often come as standard features. However, this precision and convenience come with a higher price tag. Beginners might also find them a bit tricky to operate.
Cabinet Incubators
If you’re looking for large capacity and stable conditions, cabinet incubators are the way to go. They offer very stable temperature and humidity levels, making them ideal for serious breeders. However, these perks come with drawbacks. Cabinet incubators are usually the most expensive option and can take up significant space in your home or breeding facility.
| Steps | Description | Tools/Equipment Needed |
| Preparing the Eggs | Gently collect eggs and identify healthy ones for incubation. | Soft brush and nesting box. |
| Setting Up Incubator | Fill containers with substrate and set the temperature. | Incubator, substrate, thermometer, and hygrometer. |
| Placing the Eggs | Position the eggs on the substrate in the container. | Containers and substrate. |
| Monitoring and Adjusting | Check temperature and humidity daily and make adjustments if needed. | Thermometer, hygrometer, and distilled water. |
DIY Incubator for Leopard Gecko Eggs
Not interested in buying a commercial incubator? You can make your own at home. DIY options can be cost-effective and efficient if you know what you’re doing.
Basic Styrofoam Cooler Incubator
A Styrofoam cooler can serve as a simple yet effective incubator. It’s a great starting point for beginners. Let’s look at how to set it up:
Materials Needed:
- Styrofoam cooler
- Heat mat
- Thermometer
- Hygrometer
- Small containers
- Substrate (vermiculite or perlite)
Instructions:
- Place Heat Mat: Put the heat mat at the bottom of the cooler.
- Install Thermometer and Hygrometer: Attach these devices to the cooler’s interior.
- Fill Containers: Add moist substrate to small containers.
- Set Temperature: Use the heat mat’s control to set the desired temperature.
- Monitor: Regularly check the thermometer and hygrometer to ensure stable conditions.
Plastic Storage Tub Incubator
A plastic storage tub can also work well as an incubator. It’s a bit more durable than Styrofoam and easy to clean. Here’s how to assemble one:
Materials Needed:
- Plastic storage tub with lid
- Heat tape or heat mat
- Thermometer
- Hygrometer
- Small containers
- Substrate
Instructions:
- Attach Heat Source: Place heat tape or a heat mat at the bottom of the tub.
- Install Monitoring Devices: Put the thermometer and hygrometer inside.
- Prepare Containers: Fill small containers with moist substrate.
- Set and Check: Adjust the heat source to the right temperature and monitor regularly.
Mini-Fridge Conversion
Got an old mini-fridge? You can convert it into a high-capacity incubator. This option allows for more precise control over temperature and humidity.
Materials Needed:
- Mini-fridge
- Heat tape
- Thermostat
- Thermometer
- Hygrometer
- Small containers
- Substrate
Instructions:
- Remove Shelves: Take out any shelves to make room for the containers.
- Install Heat Tape: Line the fridge’s interior with heat tape.
- Connect Thermostat: Attach the thermostat to the heat tape for temperature control.
- Place Monitoring Devices: Install the thermometer and hygrometer.
- Prepare Containers: Fill them with a moist substrate.
- Set Controls: Use the thermostat to set your desired temperature and monitor the readings.
How to Incubate Leopard Gecko Eggs Without an Incubator
No incubator? No problem. You can still incubate leopard gecko eggs using some household items and warm space.
Materials Needed
- Warm room or space near a heat source
- Small container with lid
- Substrate like vermiculite or perlite
- Thermometer
- Hygrometer
Steps
- Choose Location: Pick a warm area in your home that maintains a consistent temperature.
- Prepare Container: Fill a small container with moist substrate.
- Place Eggs: Gently set the eggs on the substrate.
- Cover: Put the lid on the container, allowing some ventilation.
- Monitor: Use a thermometer and hygrometer to keep track of conditions.
- Adjust: Move the container closer to or farther from the heat source if needed.
Conclusion
Successfully incubating leopard gecko eggs brings immense joy, especially when you witness the hatchlings emerge. It’s a rewarding experience that makes all the preparation and monitoring worthwhile. Whether you’re a beginner or a seasoned breeder, always prioritize responsible reptile care and breeding.
FAQs
Can Leopard Gecko Eggs Hatch Without an Incubator?
Yes, but it requires a consistently warm and humid environment.
How Long Do You Incubate Leopard Gecko Eggs?
Between 35 to 89 days, depending on the temperature.
How Do You Make an Incubator for Leopard Gecko Eggs?
You can use a Styrofoam cooler, or plastic tub, or even convert a mini-fridge equipped with a heat source and monitoring devices.


