
Are you curious about how to hatch crested gecko eggs at home? Do you wonder what it takes to ensure the safe arrival of these tiny reptilian bundles of joy? This article explores the intriguing world of crested gecko egg incubation and offers strategies to make it effective and rewarding.
Imagine being a part of a magical process where you witness these miniature dinosaurs’ birth. The secrets of correct incubation can significantly affect the health and well-being of these future gecko superstars. Get your magnifying lens ready to explore the magical realm of crested gecko egg incubation, where every detail matters.
Crested Gecko Reproduction
Crested geckos, fascinating small critters, reproduce through oviparous. This means the female lays eggs instead of giving birth to live young. When a female crested gecko is ready to reproduce, she usually lays eggs every month. These eggs have a sticky surface, which helps them adhere to the nesting environment.
Temperature plays a crucial role in determining the sex of crested gecko hatchlings. This process is known as temperature-dependent sex determination. When the eggs are kept at 72 to 80°F, they typically hatch as female geckos.
If the temperature is slightly lower, around 69 to 71°F, male geckos are more likely to emerge from the eggs. This fascinating system shows how environmental factors can influence the gender of these cute little reptiles.
Materials Needed
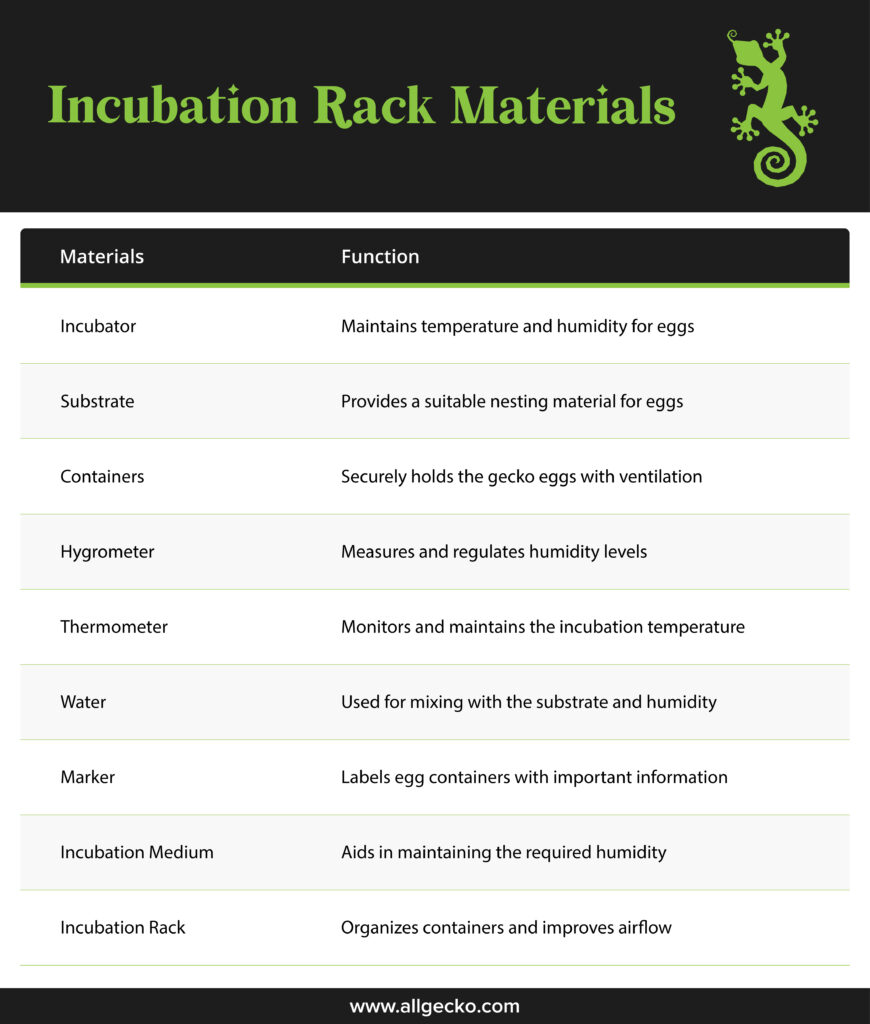
It’s essential to know how to prepare for the incubation process. Crested geckos are fascinating creatures, and caring for their eggs can be a rewarding experience. Here are the materials needed for crested gecko egg incubation:
1. Incubator
An incubator is designed to mimic a warm and humid environment, creating a haven for gecko eggs to develop. Maintain a temperature between 75 to 80°F and humidity at around 80% to ensure optimal incubation conditions.
2. Substrate
The substrate is like a cozy nesting material for the eggs. It is typically a mixture of vermiculite and water. The substrate should have the consistency of damp sand, providing a secure and humid environment for the eggs to thrive.
3. Containers
Choose small, secure containers for your gecko eggs, such as plastic deli cups or Tupperware containers with snug-fitting lids. Ensure these containers have small ventilation holes to allow for proper air exchange.
4. Hygrometer
A hygrometer is a device used to measure humidity levels. Monitoring and regulating incubator moisture is crucial to preventing eggs from drying or becoming mushy.
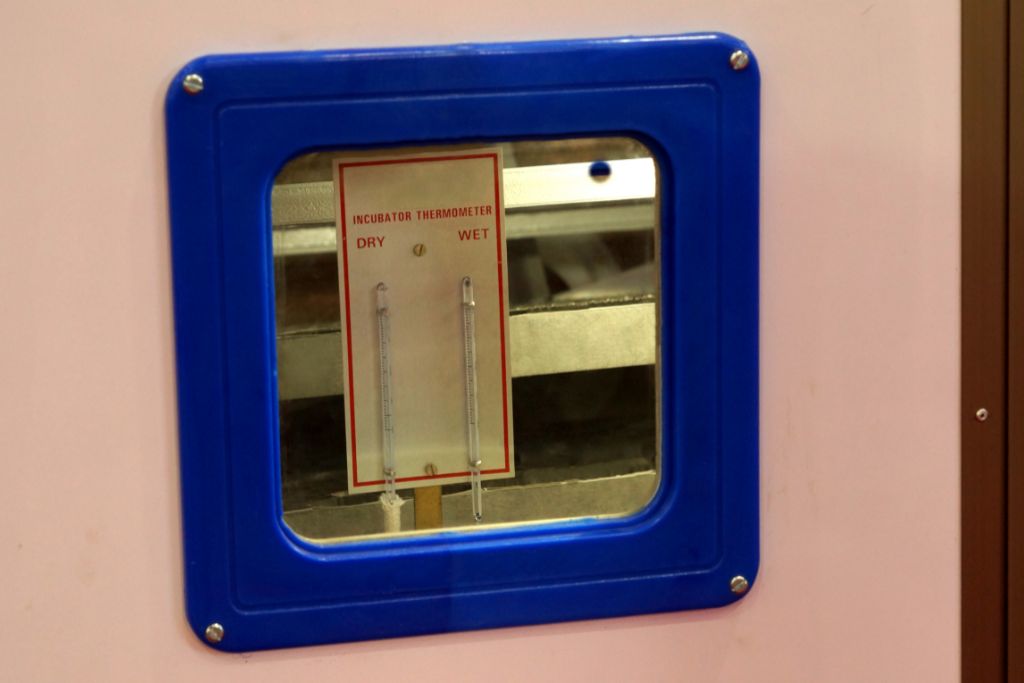
5. Thermometer
A thermometer is essential for monitoring the temperature inside the incubator. It ensures that the incubation environment remains consistent and within the recommended range, typically between 72 to 80°F.
6. Water
You’ll need dechlorinated water to mix with the substrate and maintain proper humidity levels. Tap water should be dechlorinated to remove contaminants that could harm eggs.
7. Marker
Label your egg containers with important information, such as when the eggs were laid. Their expected hatch date is crucial for tracking their progress and ensuring they receive the proper care.
8. Incubation Medium
Besides vermiculite, other incubation mediums like perlite can be used. The choice of medium depends on personal preference, but it’s essential to ensure it can maintain the necessary humidity.
9. Incubation Rack
An incubation rack or shelving unit can arrange containers, improve airflow, and maximize space. It’s especially helpful when incubating multiple clutches.
Step-by-Step Guide on How to Incubate Crested Gecko Eggs
Incubating crested gecko eggs is fascinating and important. Give crested gecko eggs the ideal circumstances to hatch with this simple guide.
1. Preparing the Eggs
To start, gently remove the eggs from the gecko’s enclosure, ensuring not to apply too much pressure. Because embryos are sensitive, rotating the eggs during this process can injure them. To keep the eggs in the same orientation, bury them halfway in perlite or vermiculite.
Identifying healthy eggs is also essential for successful incubation. Healthy crested gecko eggs are usually plump and have a consistent, slightly leathery texture. They should be free from any discoloration, dents, or unusual spots. Unhealthy eggs may feel too soft, have mold on the surface, or have a foul odor.
Removing damaged or questionable eggs is essential to prevent them from affecting others.
2. Setting Up the Incubator
Crested geckos are fascinating creatures; the incubation temperature can determine their gender. Keep it warm at 72 to 80°F. To create a cozy nest for the gecko eggs, you’ll need to follow these steps:
- Selecting the Right Container: Choose a clean, plastic container with a lid that seals well. Make sure it’s big enough to hold your eggs and substrate, but it could be more spacious.
- The Perfect Substrate: Use a particular incubation substrate, like vermiculite or perlite. This substrate holds moisture well and helps regulate humidity. Fill the container about two-thirds full with the substrate.
- Adding Water: Slowly add water to the substrate, mixing it until it’s evenly moist but not soaking wet. You want it to feel like a damp sponge when squeezing it, but no water should drip.
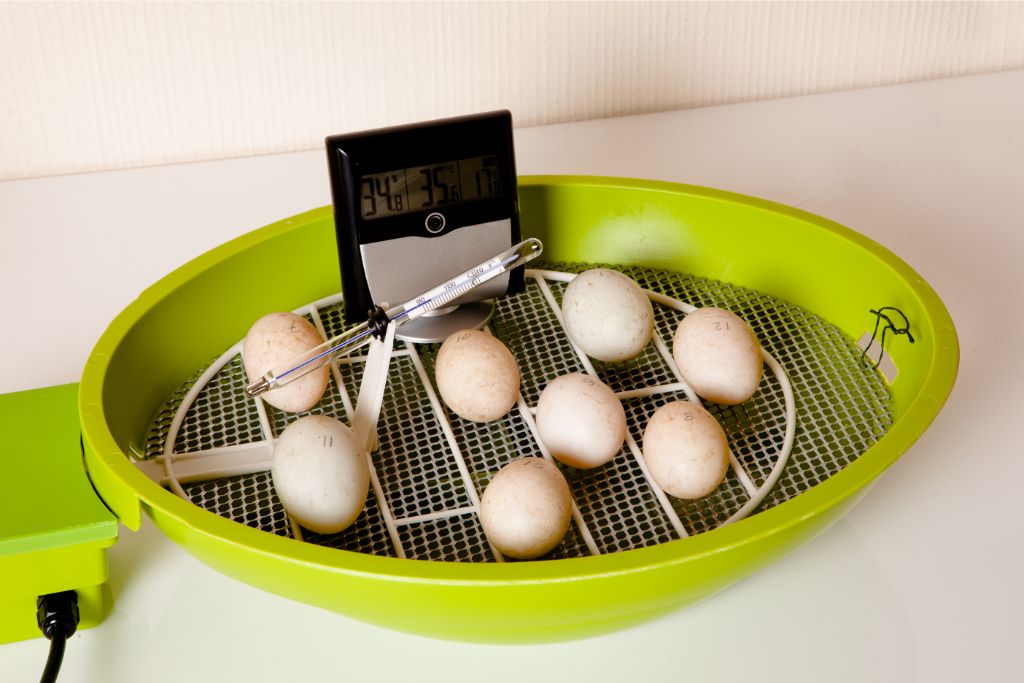
- Setting Up the Incubator: Place your container with the substrate and eggs in an incubator. A reliable small incubator, like a shoebox incubator, works excellently.
- Monitoring Temperature: A good-quality thermometer monitors the incubator’s temperature closely. Make adjustments as needed to maintain the correct temperature range.
3. Placing the Crested Gecko Eggs
Here are some instructions on how to position crested gecko eggs in the incubation container:
- Create a Nest: Make a little “nest” inside the container by placing a layer of moist but not soggy vermiculite or perlite. This will be the cozy spot for the eggs.
- Space Them Out: Gently place the eggs on top of the vermiculite or perlite, ensuring space between each one. This space helps prevent the eggs from crowding.
- Use Egg Containers: If you have egg containers or cups, you can cradle each egg individually, ensuring they don’t touch.
- Maintain the Right Humidity: Keeping the vermiculite or perlite slightly moist but not too wet is essential. Use a spray bottle to mist the substrate regularly to maintain the correct humidity level.
- Check for Damage: Be very gentle when handling the eggs to prevent damage. Damaged eggs might not hatch.
4. Monitoring and Adjusting
Maintaining a consistent temperature and humidity in their environment is super important! If the temperature gets too hot or cold, it can affect how well things work. High humidity can mold the eggs, while low humidity makes us feel dry and uncomfortable. To keep things just right, we can use thermostats and humidifiers.
Duration of Incubation
Crested gecko eggs typically have an incubation period of around 60 to 90 days. This duration can vary slightly depending on factors like temperature and humidity. Keeping the eggs in a controlled environment is essential to ensure a successful hatch.
As the eggs get closer to hatching, you might notice signs, like dimpling or pipping. Dimpling is when the eggs start to cave in, indicating that the baby gecko is preparing to break free. Pipping is the excited moment when the eggshell cracks or holes appear, showing the gecko is hatching.
How to Incubate Crested Gecko Eggs Without an Incubator
If you don’t have an incubator, you can still successfully incubate their eggs using alternative methods. Here’s a simple guide:
- Create a Comfortable Nest: Prepare a small, well-insulated container, like a plastic tub or a shoebox, lined with damp paper towels or sphagnum moss. This will serve as the “nest” for your gecko eggs.
- Keep the Nest Moist: Maintain a moist environment within the nest by spritzing water lightly over the paper towels or moss. Be cautious not to make it too wet; the medium should feel slightly damp, not soaking.
- Use a Temperature Source: Implement a gentle heat source to maintain the desired temperature. A low-wattage heating pad beneath the container or a light bulb can help achieve the right warmth.
- Monitor Temperature and Humidity: Use a thermometer and a hygrometer to track the temperature and humidity levels in the nest. Adjust the heat source and moisture as needed to maintain consistency.
- Turn the Eggs: Carefully turn the eggs every few days to ensure even incubation. Gently rotate each egg a quarter turn, but remember to handle them with clean hands to avoid transferring oils or contaminants.
- Be Patient: Crested gecko eggs usually take 60 to 90 days to hatch. During this time, maintain the temperature and humidity levels diligently. Avoid the temptation to disturb the eggs too often.
Conclusion
Successful incubation brings immense joy as we watch new reptile life emerge. Witnessing these hatchlings is a truly magical experience. It’s essential to remember that responsible reptile breeding and care ensure the well-being of these remarkable creatures.
By caring for them, we can help preserve their unique and diverse species for future generations.
FAQs
What is the Ideal Temperature Range for Incubating Crested Gecko Eggs?
The ideal temperature range for incubating crested gecko eggs is typically between 72 to 80°F.
How Do I Raise Crested Gecko Eggs?
Carefully remove crested gecko eggs from the enclosure and place them in an incubation container with vermiculite to raise them. Maintain proper humidity levels (around 80%) and ensure good ventilation. Incubate it at 72 to 80°F.


